10 Real Estate Photography Tips That Sell Homes Faster
Unlocking the Power of Visuals to Captivate Buyers and Accelerate Sales

The First Impression That Sells: Why Photography Is Your Secret Weapon
Ever scrolled through real estate listings, only to find yourself instantly drawn to some and quickly swiping past others? Chances are, the difference wasn't just the price or location; it was the photography. In today's highly visual world, stunning real estate photography tips aren't just a nice-to-have – they're a non-negotiable cornerstone of effective property marketing.
Think about it: before a buyer ever steps foot in a home, they've already formed an impression based on its online presence. Professional, captivating photos don't just showcase a property; they tell a story, evoke emotion, and invite potential buyers to imagine themselves living there. This immediate connection is precisely what can set your listing apart, generate more interest, and ultimately, help you sell homes faster.
As real estate professionals, we understand the immense pressure to stand out. And while hiring a pro photographer is always recommended, knowing the fundamentals yourself can empower you to guide the process, troubleshoot on the fly, and even capture compelling shots for social media or initial walkthroughs. Ready to transform your listings and accelerate your sales cycle? Let’s dive into 10 real estate photography tips that will give your properties the spotlight they deserve.
1. Stage the Home Like a Pro (Before the Camera Even Comes Out)
This isn't a photography tip in the strictest sense, but it’s arguably the most critical step. A camera can only capture what’s in front of it. No amount of editing can truly fix a cluttered, dirty, or poorly arranged space. Professional home staging, or at least a thorough decluttering and cleaning, is paramount for impactful real estate photography.
The Pre-Shoot Checklist:
- Declutter Ruthlessly: Remove personal items, excessive furniture, and anything that makes a room feel small or busy. Think minimalist and inviting.
- Deep Clean Everything: Sparkling windows, dust-free surfaces, clean floors, and fresh bathrooms make a huge difference. Don't forget the baseboards and light fixtures!
- Depersonalize: Family photos, unique art, and personal collections can distract buyers from envisioning themselves in the space.
- Minor Repairs: Fix leaky faucets, touch up paint, and replace burnt-out light bulbs. These small details show attention and care.
- Arrange Furniture for Flow: Create clear pathways and conversational groupings that highlight the room’s purpose and size.
Imagine a potential buyer looking at a photo of a kitchen counter piled high with mail and dirty dishes versus a pristine counter with a vase of fresh flowers and a bowl of fruit. Which one invites them to envision cooking family meals? This preparatory work is the foundation for all great property photography.
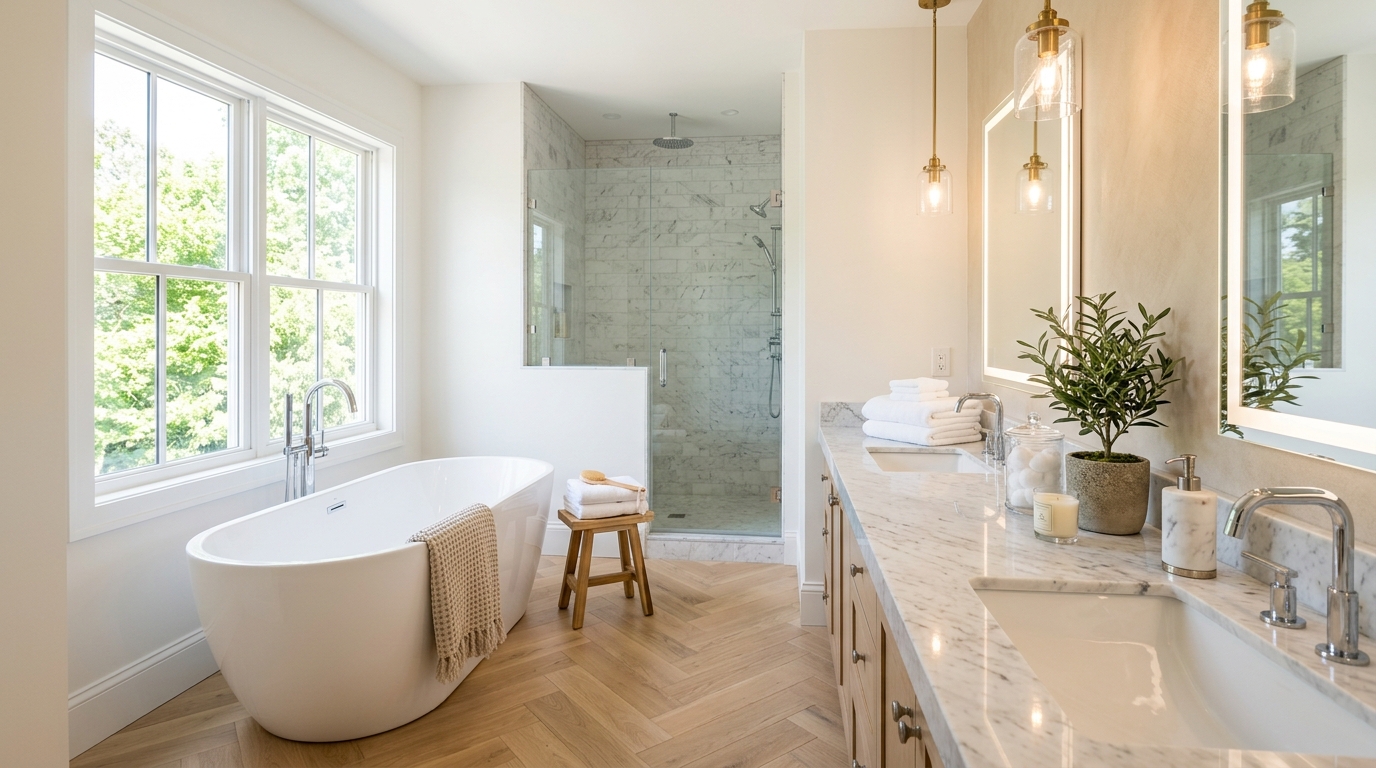
2. Master the Art of Lighting: Natural Light is Your Best Friend
Lighting can make or break a photo. Natural light is almost always superior, creating a warm, inviting, and authentic feel. It highlights textures and colors more accurately than artificial light alone.
Leveraging Light for Impact:
- Open Everything Up: Pull back curtains, open blinds, and let as much natural light flood into the room as possible.
- Turn On All Lights: Supplement natural light with interior lights – overheads, lamps, under-cabinet lighting. This helps brighten dark corners and balance exposures. Ensure all bulbs are the same color temperature (e.g., all warm white or all cool white) to avoid strange color casts.
- Timing is Key: Schedule your shoot during the brightest part of the day, typically late morning to early afternoon, when the sun is high. For exteriors, the “golden hour” (an hour after sunrise or an hour before sunset) can create stunning, soft, and flattering light.
- Avoid Direct Sunlight Glare: While natural light is great, direct, harsh sunlight streaming through a window can create blown-out highlights or deep shadows. Try to shoot when the sun is bright but not directly blinding into your lens.
A well-lit room feels spacious, clean, and welcoming. Poor lighting can make a room appear dingy, small, and uninviting, regardless of its actual qualities. These are crucial home selling photography tips.
3. Invest in a Wide-Angle Lens (But Use It Wisely)
A wide-angle lens is a real estate photographer's essential tool. It allows you to capture more of a room, making spaces appear larger and more expansive than they might with a standard lens. This is particularly vital for small bathrooms, bedrooms, and kitchens.
Wide-Angle Wisdom:
- Show the Full Scope: A lens with a focal length between 10mm and 20mm (on a crop sensor) or 16mm and 24mm (on a full-frame camera) is ideal for interior spaces.
- Avoid Excessive Distortion: While wide-angle is great, going too wide can introduce noticeable distortion, making walls curve or objects at the edges appear stretched. Aim for a balance that shows space without making it look unnatural.
- Keep Lines Straight: When shooting with a wide-angle, it’s even more critical to keep your camera level to prevent walls and doorways from appearing crooked.
The goal is to give buyers an accurate yet appealing representation of the space. A good wide-angle shot helps them understand the layout and flow, a key component of effective listing photos.
4. Shoot from the Right Height and Angle
The perspective from which you take a photo significantly impacts how a room is perceived. Most real estate photography looks best when shot from a consistent height, typically around chest or shoulder height (about 4-5 feet off the ground).
Perspective Perfected:
- Consistent Eye-Level: This height mimics how a person would naturally view the room when standing, making the photos feel more relatable and less distorted.
- Corners and Angles: Often, shooting from a corner of a room, aiming towards the opposite corner, provides the best sense of depth and space, showcasing two walls and the floor.
- Straight Lines are Crucial: Ensure your camera is perfectly level, both horizontally and vertically. Crooked walls or tilted horizons are instant red flags and make photos look amateurish. A tripod with a built-in level is invaluable here.
- Rule of Thirds: Apply this classic composition rule. Imagine a grid over your image and place points of interest (like a fireplace or a large window) along the lines or at their intersections for a more balanced and engaging shot.
Paying attention to these details ensures your professional real estate photos are not only attractive but also visually stable and easy on the eye.
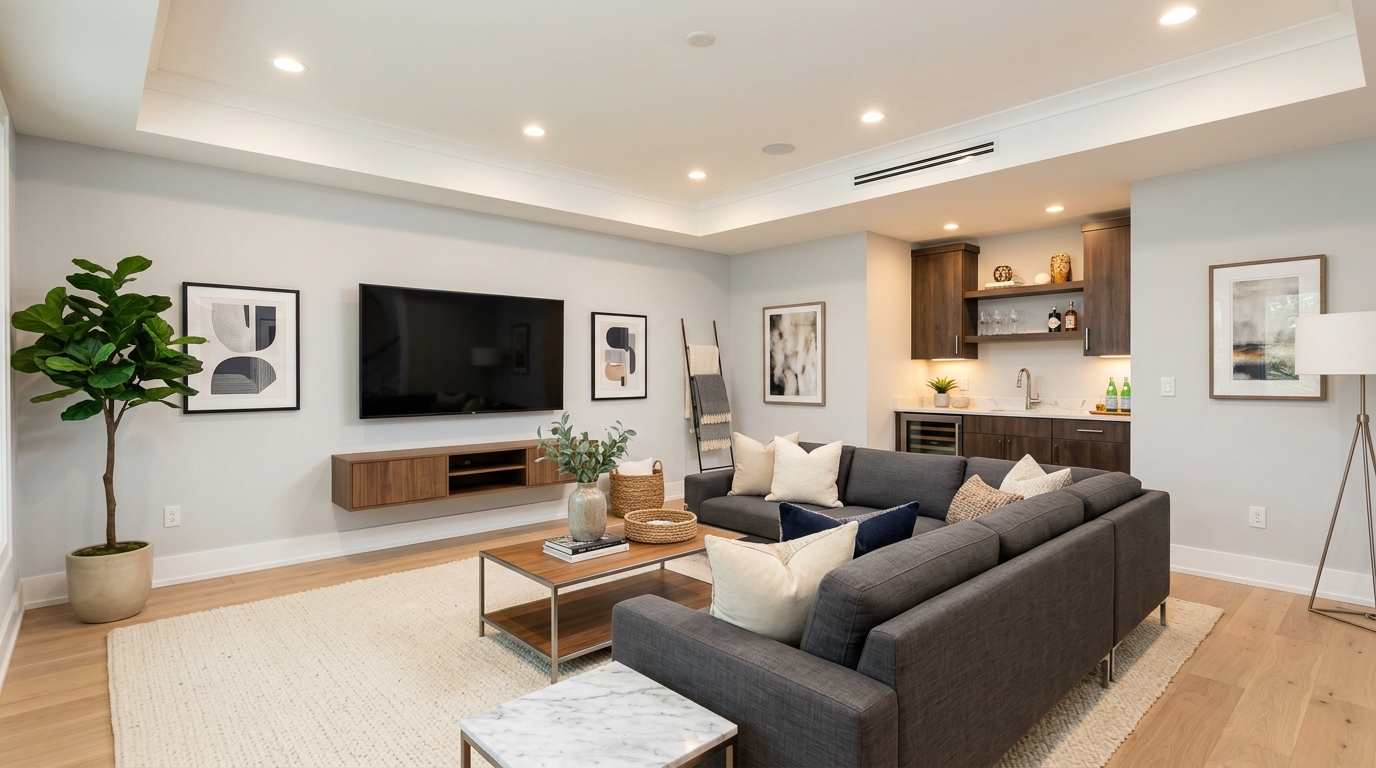
5. Focus on Key Selling Features and Unique Details
Every home has its unique selling propositions. Your photography should highlight these, drawing attention to what makes the property special and valuable.
Highlighting What Matters:
- Architectural Details: Ornate moldings, built-in bookshelves, unique fireplaces, or exposed brick walls.
- Recent Upgrades: A newly renovated kitchen, updated bathrooms, smart home technology, or energy-efficient windows.
- Views: If the property has a stunning city skyline, mountain range, or waterfront view, make sure to capture it prominently.
- Outdoor Amenities: A well-maintained garden, a sparkling pool, a spacious deck, or an outdoor kitchen.
Don't just photograph rooms; photograph the lifestyle the home offers. These specific shots are powerful visual marketing tools that resonate with buyers' desires and help sell properties faster.
6. Embrace Drone Photography for a Grand Perspective
For certain properties, especially those with large lots, unique surroundings, or impressive architectural scale, drone photography is a game-changer. It offers a perspective impossible to achieve from the ground.
The Aerial Advantage:
- Showcase the Entire Property: Drone shots can beautifully capture the full extent of a home, its landscaping, and any outbuildings.
- Highlight Location Benefits: Proximity to parks, water features, golf courses, or town centers can be elegantly displayed from above.
- Capture Unique Views: If the home boasts stunning rooftop patios or overlooks a scenic landscape, a drone can capture these vistas perfectly.
- Plot Boundaries: For larger parcels of land, aerial shots can help buyers visualize the property lines and overall acreage.
Remember, drone operation often requires licensing and adherence to local regulations. Always prioritize safety and legal compliance. Aerial real estate photography tips are increasingly vital for luxury and unique listings.
7. Incorporate Virtual Tours and 3D Walkthroughs
While not strictly still photography, virtual tours and 3D walkthroughs are an extension of your visual marketing strategy and often rely on photographic principles. They provide an immersive experience that traditional photos can't match, significantly increasing buyer engagement.
Beyond Still Images:
- Matterport or Similar: Tools like Matterport create interactive 3D models that allow buyers to virtually walk through a home at their own pace.
- Video Walkthroughs: A well-produced video tour with smooth transitions and good audio can highlight the flow and feel of a home.
- Increased Engagement: Listings with virtual tours receive significantly more views and longer engagement times, as buyers can truly explore the property from anywhere in the world.
- Filtering Out Unqualified Leads: Buyers who take a virtual tour are often more serious and better qualified, having already experienced the layout and general ambiance of the home.
In a competitive market, offering these advanced visual tools sets your listing apart and demonstrates a commitment to modern property marketing strategies.
8. The Power of Professional Editing (But Don't Overdo It)
Once the photos are taken, the work isn't over. Post-processing is where good photos become great. However, there's a fine line between enhancing an image and misrepresenting a property.
Editing for Excellence:
- Color Correction: Adjust white balance to ensure colors are true-to-life and vibrant, not yellow or blue-tinged.
- Exposure Adjustment: Brighten dark areas and recover details in overexposed spots to create a balanced image.
- Straighten Lines: Crucial for real estate, ensure all vertical and horizontal lines are perfectly straight.
- Remove Minor Imperfections: Use cloning tools to remove small blemishes like a stray cable, a tiny stain on the carpet, or a garbage can in the background of an exterior shot.
- Enhance Sky/Greenery: Gently enhance a dull sky or boost the vibrancy of grass and trees.
What to Avoid: Never digitally add elements that aren't there (like a stunning sunset view if it doesn't exist), remove permanent fixtures, or drastically alter room dimensions. The goal is to present the home in its best light, not to mislead buyers. Ethical editing is paramount for building trust.
9. Capture Compelling Exterior Shots and Curb Appeal
The exterior shot is often the very first image a buyer sees. It's their initial introduction to the home's personality and curb appeal, making it one of the most important real estate photography tips.
Making a Great First Impression:
- The Money Shot: Capture the entire front of the house, preferably at an angle that shows two sides, giving depth. Ensure the lawn is manicured, hedges are trimmed, and pathways are clear.
- Focus on Entrances: A clean, welcoming front door with attractive landscaping can be a powerful draw.
- Highlight Outdoor Living: Showcase patios, decks, gardens, and any unique outdoor features that add value.
- Seasonal Considerations: If possible, schedule exterior shoots when the landscaping is at its best – blooming flowers in spring, lush greenery in summer, or clean snow in winter.
- Neighborhood Context: If relevant, capture shots that show the home's position within a desirable neighborhood, near amenities, or with appealing street views.
Remember, curb appeal isn't just about the house; it's about the entire outdoor experience. These shots often determine if a buyer clicks for more details.
10. Curate Your Photo Gallery Thoughtfully for Maximum Impact
Having great individual photos is one thing; presenting them in a cohesive, compelling gallery is another. The order and selection of your images can guide the buyer through a virtual tour, building excitement with each click.
Gallery Best Practices:
- The Hero Shot First: Always start with the best exterior shot – the one that makes the strongest first impression.
- Logical Flow: Follow a natural progression through the house. Go from the entry to the living room, dining room, kitchen, then bedrooms, bathrooms, and finally, any unique features or outdoor spaces.
- Vary Your Shots: Don't show five identical photos of the living room. Mix wide shots with tighter detail shots that highlight specific features.
- Quantity vs. Quality: While more photos are generally better for online engagement, ensure every photo adds value. Aim for 25-50 high-quality photos for a standard home, adjusting up or down based on property size and features.
- Consistency: Maintain a consistent style, lighting, and editing across all images in the gallery for a professional and polished look.
A well-curated gallery isn't just a collection of images; it's a visual narrative designed to entice, inform, and convert casual browsers into serious prospects. These final real estate photography tips tie everything together.
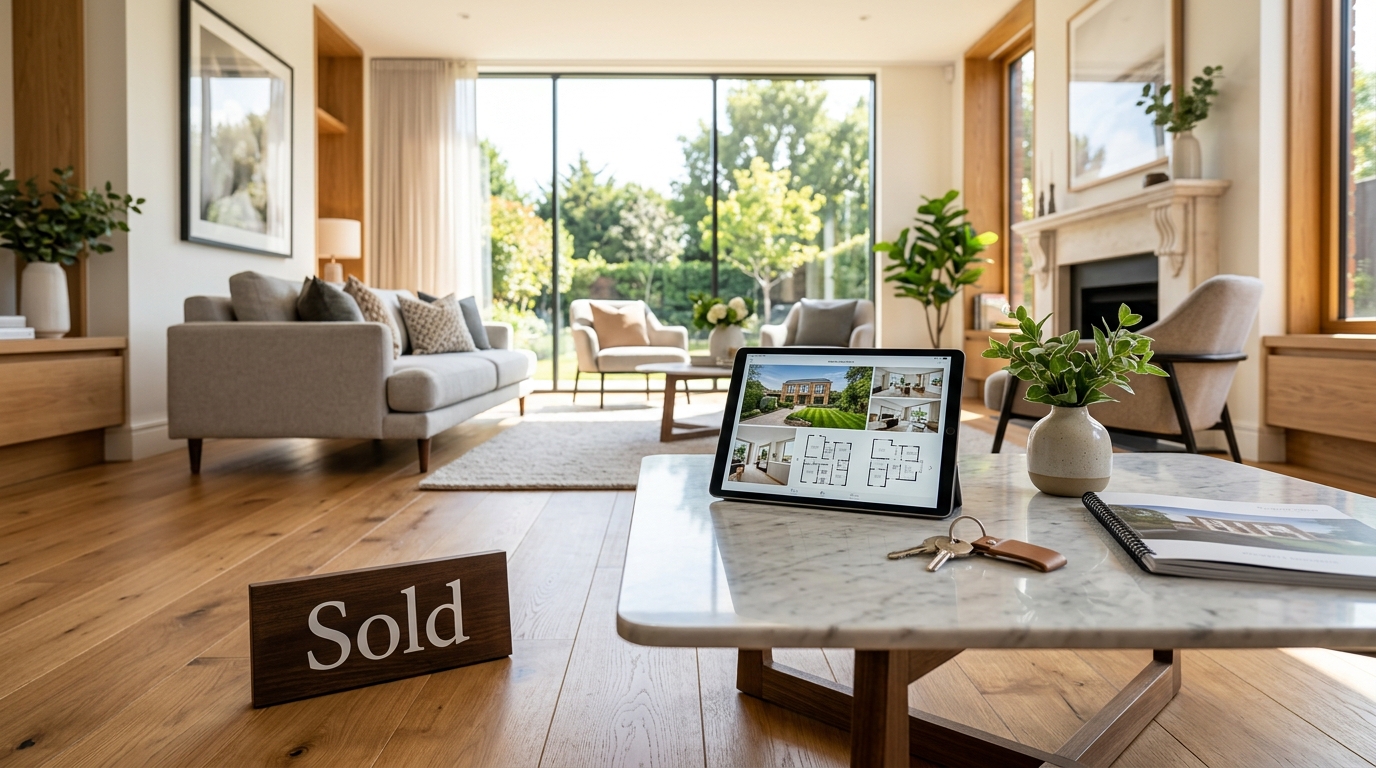
Ready to Elevate Your Listings and Sell Homes Faster?
In the competitive world of real estate, your listings are your storefront. And just like any successful retail display, they need to be irresistible. Implementing these 10 real estate photography tips isn't just about taking better pictures; it's about crafting a powerful visual story that captivates buyers, generates genuine interest, and ultimately helps you achieve your sales goals more efficiently.
Don't let mediocre photos hold your listings back. Whether you're personally honing your skills or guiding a professional photographer, understanding these principles will empower you to create compelling visual assets that stand out in a crowded market. It's an investment that pays dividends, not just in faster sales, but in building your reputation as a top-tier real estate professional.
Elevate your listings today and watch your properties move from 'for sale' to 'sold' in record time.