Smartphone Real Estate Photography: Agent's Guide to Pro Shots
Unlock stunning listing photos with just your phone – a comprehensive guide for real estate agents.
Ever scrolled through a listing and immediately swiped past because the photos were, well, less than inspiring? We've all been there. In today's hyper-visual real estate market, a picture truly is worth a thousand words – and often, thousands of dollars. While professional photography remains the gold standard for high-end listings, what if I told you that your trusty smartphone could be a powerful tool for capturing captivating real estate photos that truly stand out?
That's right! With a little know-how and the right techniques, you can elevate your real estate photography game significantly, all from the device in your pocket. This isn't about replacing the pros entirely; it's about empowering you, the busy real estate agent, to produce high-quality, engaging visuals for everything from quick social media updates to compelling preliminary listing shots. We're diving deep into **smartphone real estate photography**, giving you an agent's guide to achieving pro-level shots without the hefty gear.
Why Your Smartphone is a Secret Weapon for Real Estate Agents
Think about it: your smartphone is always with you. It's discreet, incredibly versatile, and the camera technology packed into the latest models is nothing short of astounding. For real estate agents, this means unparalleled convenience and speed. Need to grab a quick shot of a new feature? Want to update a client on progress? Or perhaps you're creating a quick property tour for social media? Your smartphone is ready when you are.
Beyond convenience, there's a powerful psychological angle. High-quality visuals grab attention. They build trust, convey professionalism, and, most importantly, generate interest. In a market where buyers often make split-second decisions based on online photos, ensuring your listings look their absolute best is non-negotiable. And while a dedicated DSLR might feel intimidating, mastering your smartphone's camera is an achievable goal for every agent looking to boost their marketing game.
The Smartphone Advantage: More Than Just Convenience
- Always Accessible: No need to lug around heavy equipment. Your phone is always in your pocket.
- Instant Sharing: Capture a photo, edit it on the fly, and share it across your platforms in minutes. Perfect for dynamic content on social media or quick updates to clients.
- Cost-Effective: No additional camera body or expensive lenses required. Leverage the tech you already own.
- Discreet: Sometimes, a less obtrusive camera can make subjects (and homeowners) more comfortable.
- Learning Curve: While there's a learning curve to *pro-level* smartphone photography, it's generally less steep than mastering a full DSLR system.
Preparing Your 'Mobile Studio': Essential Gear & Setup
While your smartphone is the star, a few affordable accessories can dramatically enhance your results. Think of them as your mobile studio essentials.
The Smartphone Itself: Maximize Your Device's Potential
Newer phone models often boast superior cameras, but even a slightly older flagship can deliver excellent results. Familiarize yourself with your phone's camera app. Explore settings like:
- Grid Lines: Essential for composition (Rule of Thirds).
- Exposure Control: The ability to manually brighten or darken a shot.
- HDR Mode: Great for balancing bright windows with darker interiors.
- Lens Options: Many phones now have multiple lenses (ultra-wide, wide, telephoto). Understand when to use each.
Lighting is Everything (Seriously!)
Natural light is your best friend. Always try to shoot during the day, opening all blinds and curtains. However, sometimes you need a little boost:
- Portable LED Light Panel: Small, battery-powered LED panels can provide soft, even fill light in darker corners. Look for adjustable brightness and color temperature.
- Reflector: A simple collapsible reflector can bounce natural light into shadowy areas, reducing harsh contrasts.
Stability is Key: Say Goodbye to Blurry Shots
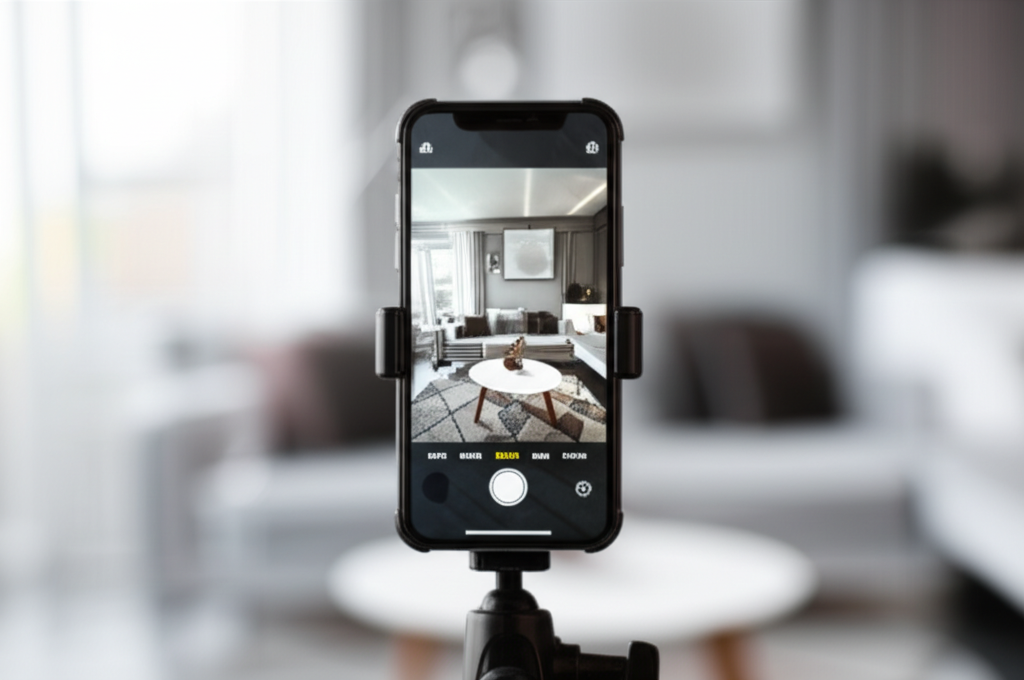
The biggest killer of smartphone photo quality? Camera shake. A tripod is non-negotiable for sharp, professional-looking images, especially in lower light.
- Smartphone Tripod: Many compact tripods come with a universal phone mount.
- Gimbal Stabilizer: For video work, a gimbal provides incredibly smooth, cinematic footage, perfect for property walkthroughs.
Lenses & Attachments: Proceed with Caution
Clip-on wide-angle lenses can be tempting, but they often introduce distortion and can degrade image quality. If you do opt for one, invest in a reputable brand and use it sparingly. For most scenarios, your phone's native wide-angle lens (if it has one) will suffice.
Cleaning Supplies: A Simple Game Changer
A smudged lens is the easiest way to ruin a great shot. Always carry a microfiber cloth to wipe down your phone's camera lens before every shoot.
Mastering the Shot: Pro Techniques for Your Phone Camera
Now that you're geared up, let's talk technique. This is where your photos go from "okay" to "wow!"
Pre-Shoot Preparation: The Foundation of a Great Photo
Before you even think about pointing your camera, prepare the space. This step is crucial, regardless of whether you're using a smartphone or a professional DSLR.
- Declutter & Depersonalize: Remove personal items, excess furniture, and anything that distracts from the home's features.
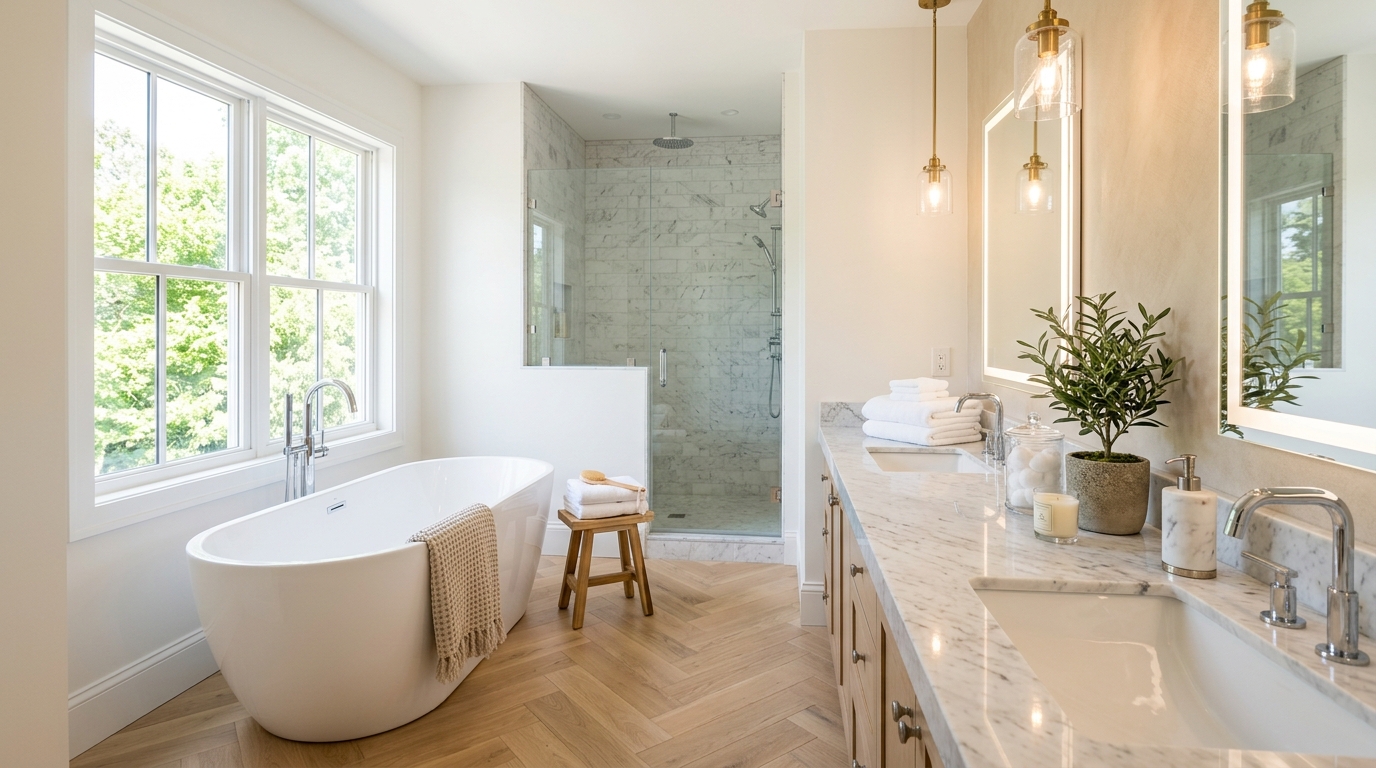
- Clean, Clean, Clean: Sparkling surfaces, dust-free shelves, and vacuumed floors make a huge difference.
- Maximize Light: Open all blinds and curtains. Turn on all lights (even lamps).
- Arrange Furniture: Create inviting vignettes that highlight the room's purpose and flow. For more detailed advice, check out our guide on Staging Your Home for Sale: Maximize Offers & Appeal.
Lighting & Exposure: The Heart of a Quality Image
As mentioned, natural light is best. Position yourself so the light source (windows) is in front of you or to your side, not directly behind the subject you're photographing. Avoid direct sunlight streaming in, as it creates harsh shadows.
- Tap to Focus & Expose: Your phone allows you to tap on the screen to set focus and exposure. Tap on a mid-toned area of the room to get a balanced exposure.
- Use HDR Mode: If you have bright windows and a darker interior, HDR (High Dynamic Range) mode takes multiple exposures and blends them, helping to balance the light.
- Avoid Flash: Built-in phone flashes are harsh and unflattering for interiors. Use external LED lights if needed.
Composition Rules: Guiding the Viewer's Eye
Good composition makes a photo aesthetically pleasing and easy to understand.
- Rule of Thirds: Enable grid lines in your phone camera settings. Place points of interest along the lines or at their intersections.
- Straight Lines: Keep vertical and horizontal lines straight. Use your phone's built-in level or grid for this. Tilted photos look unprofessional.
- Shoot from Corners: This technique adds depth and makes rooms feel larger. Position yourself in a corner and shoot towards the opposite corner.
- Eye-Level Shots: Generally, shoot from a realistic standing height. Avoid shooting too high or too low unless for a specific detail.
- Leading Lines: Use architectural features like hallways, railings, or pathways to lead the viewer's eye through the space.
Angle & Perspective: Capturing the Best of Every Space
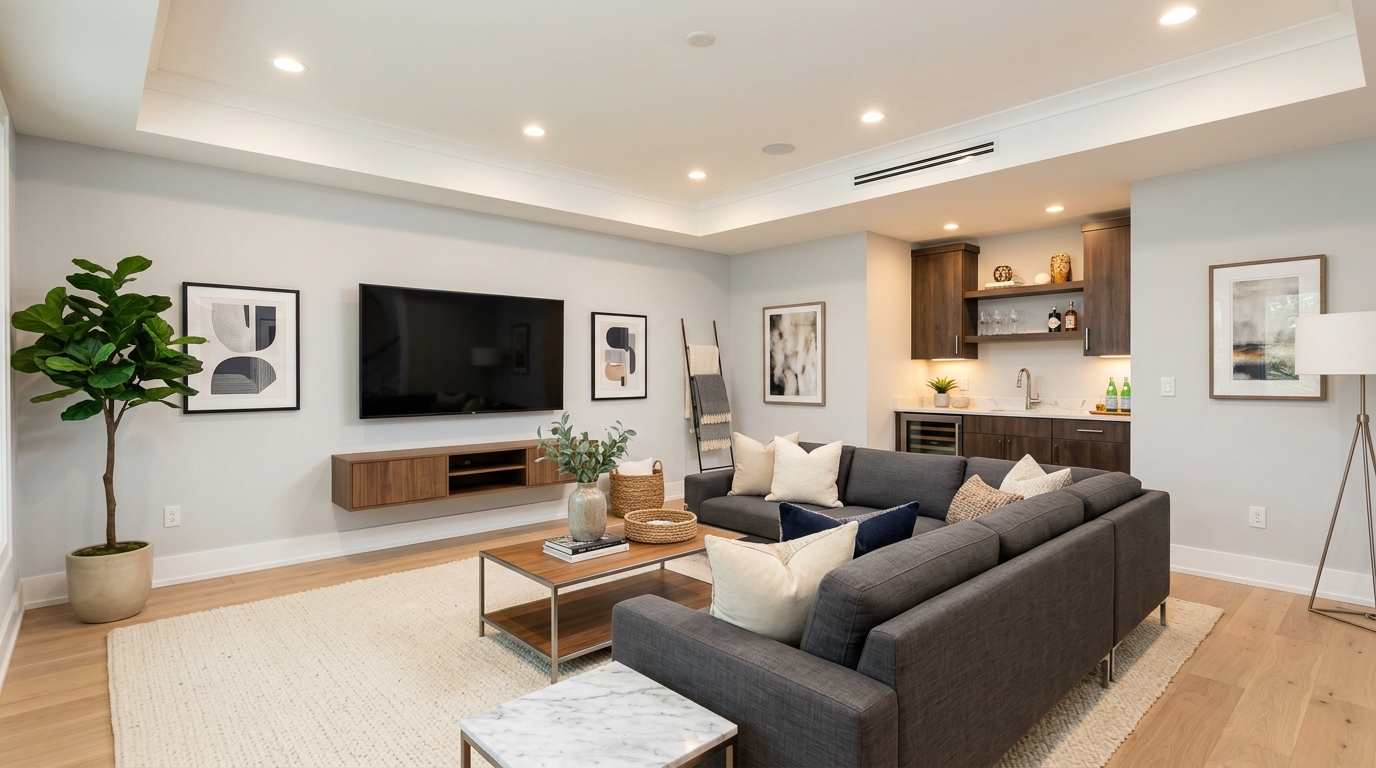
- Wide Shots for Rooms: Capture the overall feel of a room. Step back as much as possible to get a comprehensive view.
- Detail Shots: Don't forget the little things! High-end fixtures, unique finishes, custom cabinetry – these details often sell a home.
- Exterior Appeal: For the exterior, shoot on a sunny day (avoid harsh midday sun). Get a wide shot that includes some landscaping, and ensure the house numbers are visible.
Post-Production Power: Editing Your Smartphone Photos
Even the best raw photos can benefit from a little polish. Mobile editing apps are incredibly powerful and user-friendly.
Essential Mobile Editing Apps for Real Estate
- Snapseed (Google): Free, robust, and intuitive. Great for selective adjustments.
- Lightroom Mobile (Adobe): Powerful and versatile, especially if you use Lightroom on desktop. Free basic features, subscription for advanced.
- VSCO: Known for its beautiful filters, but also offers solid editing tools.
- Google Photos: Basic but effective editing tools built right into the app.
Key Editing Adjustments: What to Focus On
When editing real estate photos, the goal is enhancement, not alteration. You want to present the home accurately, just in its best light.
- Cropping & Straightening: This is probably the most important step. Crop out distractions and, above all, ensure all lines are perfectly straight.
- Brightness & Contrast: Adjust to make the image pop without looking artificial. Interiors often need a slight brightness boost.
- White Balance (Color Correction): This removes color casts (e.g., yellow from incandescent lights, blue from shadows). Aim for neutral whites.
- Saturation & Vibrance: Use sparingly to make colors more appealing without making them look fake.
- Sharpening: A touch of sharpening can make details crisper. Don't overdo it, or you'll introduce noise.
- Noise Reduction: If you had to shoot in low light, you might have some "grain" or noise. Use noise reduction cautiously.
Avoiding Over-Editing: Authenticity is Key
Remember, you're selling a home, not a fantasy. Buyers will be disappointed if the photos don't accurately represent the property. Avoid heavy filters, extreme color shifts, or anything that makes the home look significantly different in person.
Beyond the Still Frame: Video with Your Smartphone
Your smartphone isn't just for photos! Short video tours, walkthroughs, and even quick clips of unique features can significantly boost engagement. Social media platforms, in particular, favor video content.
Consider creating engaging short-form videos for platforms like Instagram and TikTok. Our guide on Reels for Realtors: Master Instagram & TikTok for Leads offers fantastic strategies for leveraging video to connect with potential buyers. Use a gimbal for smooth, professional-looking footage, and keep your videos concise and to the point.
When to Call the Pros: Recognizing the Limits of Smartphone Photography
While smartphone real estate photography is incredibly powerful, it's essential to know its limits. For certain situations, professional photographers are still indispensable:
- Luxury Listings: High-end properties often demand the specialized equipment, lighting expertise, and advanced editing of a professional to truly capture their grandeur.
- Complex Lighting: Homes with very challenging lighting conditions (e.g., extremely dark rooms, mixed light sources) often require pro-level gear and techniques.
- Aerial Photography: For stunning overhead shots that showcase property boundaries, neighborhood context, or unique features, drone photography for real estate is the way to go.
- Time Constraints: If you're short on time, outsourcing photography can be a smart move, allowing you to focus on other aspects of the sale.
- When Perfection is Paramount: For your flagship listings or properties where every detail must be flawless, a professional investment is always worthwhile.
Think of your smartphone as an incredible tool for 80% of your visual content needs – especially for quick updates, social media engagement, and initial listing photos. For that crucial 20% that requires specialized expertise, don't hesitate to bring in a professional.
Integrating Smartphone Photos into Your Marketing Strategy
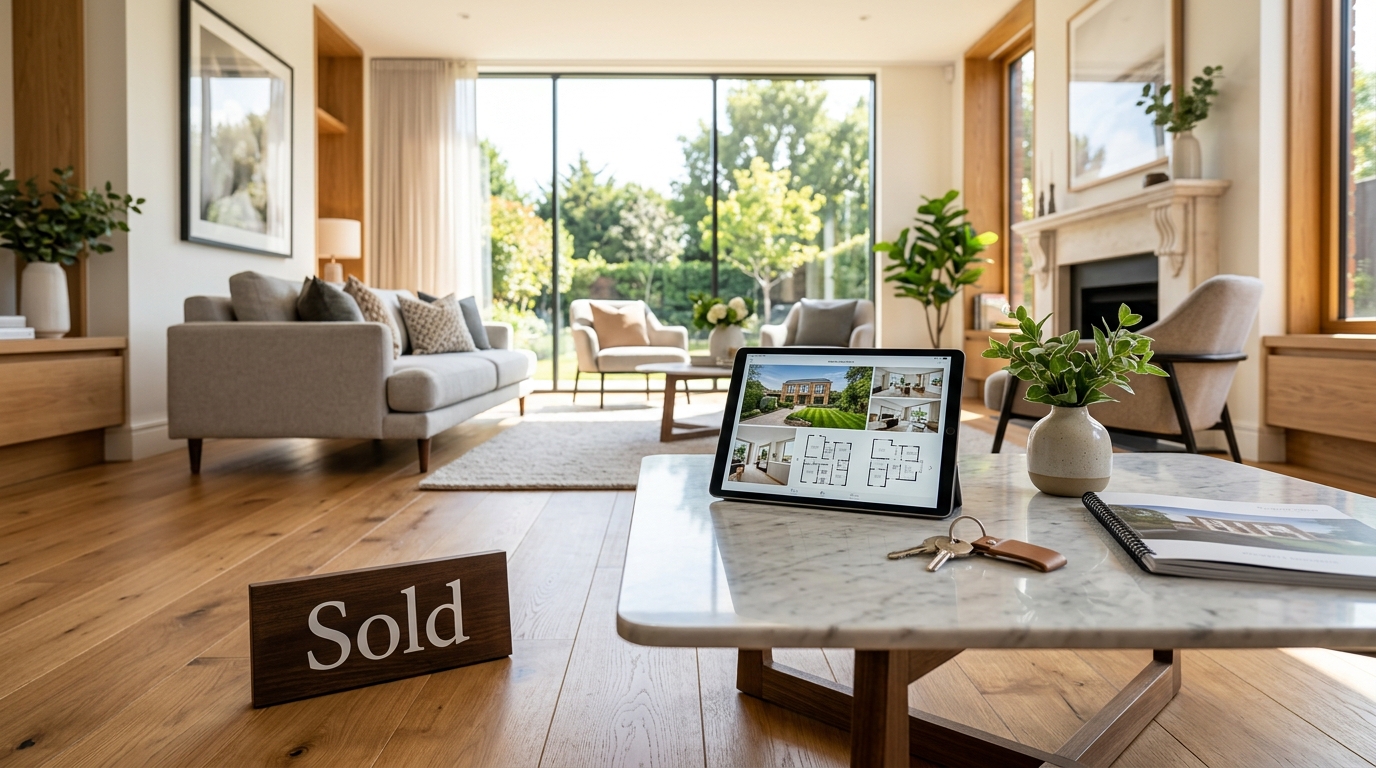
So, you've captured and edited some fantastic smartphone photos. Now what? Integrate them strategically into your marketing efforts:
- Social Media: High-quality photos are perfect for Instagram, Facebook, and even LinkedIn posts. Use them to highlight new listings, showcase open houses, or simply offer a sneak peek.
- Listing Portals: While professional photos should lead, compelling smartphone shots can be used for secondary images or updates.
- Email Marketing: Include engaging images in your newsletters and property alerts. Visuals dramatically increase engagement in email marketing for real estate agents.
- Your Website/Blog: Use them for blog posts about local areas, property features, or even your own office updates.
- Client Communication: Send quick, clear photos to clients for updates on repairs, staging progress, or showing feedback.
Conclusion: Elevate Your Listings, One Photo at a Time
The days of blurry, dimly lit listing photos are thankfully behind us. With the incredible technology packed into modern smartphones and the actionable techniques we've covered, you have the power to transform your real estate visuals. Mastering **smartphone real estate photography** isn't just about saving money; it's about empowering you to be more agile, more responsive, and ultimately, more effective in showcasing your listings.
Start experimenting today. Practice in different lighting conditions, play with composition, and get comfortable with mobile editing apps. You'll be amazed at the professional-grade results you can achieve. Your next listing deserves to shine, and your smartphone is ready to help you make it happen. Go forth, capture, and close those deals!